
Why is My Car Leaking Oil After an Oil Change?
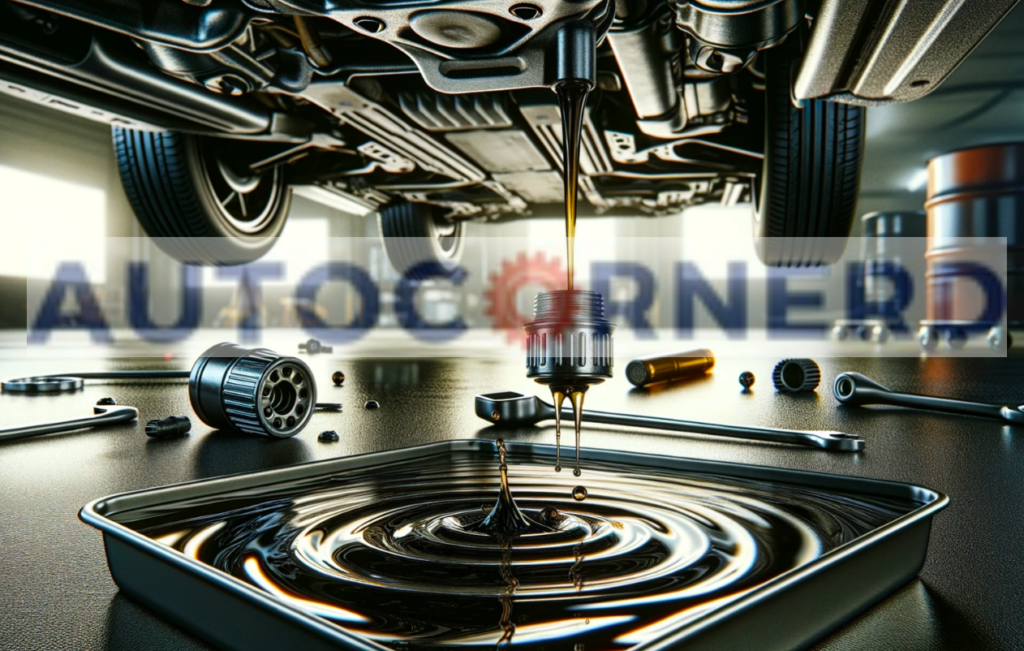
I recently had my car oil changed and noticed it started leaking oil afterwards. From my experience, there are a few common reasons this can happen. First, the drain plug may not be tightened properly. It needs to be sealed up tight so oil doesn’t drain out. Next, The oil filter could also be loose. This filter unscrews to let the old oil drain out when changed, but then needs to be replaced and screwed on tightly. If it’s not on snugly, oil can seep past the filter seal. Sometimes the engine can accidentally get overfilled with too much oil. Checking the dipstick is important to add the proper amount after an oil change. Too much oil in the crankcase can cause leaks. Oil pressure sensor can also let oil escape. Replacing this sensor is an easy fix if that’s the culprit. And oil pans can develop cracks over time, allowing oil to drip down below the engine. Replacing a damaged pan will stop this type of leak.
It’s no surprise that as a responsible car owner, you’ve heard of the importance of regular oil changes and followed through with one recently. You may have even done it either yourself or at the dealership!
But, it can be a shock to come home and see a puddle of oil oozing from your car. Let’s start by talking about the most common reasons oil leaks after an oil change. This way you can get your vehicle back in good health.
If you have parked your car for some time and oil is leaking out of somewhere, you can read my guide on that topic.
To enhance your troubleshooting of the oil leaking issue, I have provided below some essential concepts. These concise sections will aid your comprehension of the topic before delving into the various causes of oil leakage.
However, if you just want to jump to the causes of oil leaking after oil change click here.
For your convenience, I’ve designed an interactive tool that diagnoses car troubles. It walks you through straightforward steps. Make sure to use it.
- Oil leaks after an oil change can happen due to residual oil, overfilled engine oil, improperly installed filter, loose drain plug, damaged gasket, or using the wrong oil grade.
- It’s safe to drive with a minor leak if oil level and pressure are okay, but leaks should be fixed soon to avoid engine damage.
- Loose drain plugs, crushed gaskets, uncleaned mating surfaces, overtightening, and reuse of old parts can prevent proper seals after an oil change service.
- As engines age, switching to thicker oil can reduce leaks from worn seals.
What is My Personal Experience With Car Leaking Oil After Service?
Once I noticed a small puddle of oil forming under my car after an oil change. Concerned, I immediately checked the dipstick and saw the oil level was fine.
I crawled under the car and discovered the leak was coming from a loose drain plug.
I tightened it with a wrench and added a new crush washer for good measure. No more leaks! Proper diagnosis allowed me to quickly fix the oil leak myself without costly repairs.
A check engine light can also trigger after changing the oil. If you are facing this issue, you can read my guide on that topic.
Visual Inspection Of Oil Leak Or Dripping
Before you investigate the reasons behind oil leaking after changing oil, you should first confirm that it is actually engine oil and not something else.
Oftentimes, people mistake engine oil, transmission oil, brake oil, and coolant.
So, if the color of liquid leaking from car while changing oil is:
- Brown/golden or black: It indicates engine oil.
- Blue, orange or green: It indicates engine coolant.
- Reddish or red-brown: It indicates transmission oil.
- Brake oil: Almost the same color as engine oil i.e. beige or yellow color. It also gets dark brown/black with time.
Is It Safe To Drive With An Oil Leak?
To me, it seems safe to keep driving if you have an oil leak, but there are a couple things you need to check first.
Number one, you gotta make sure the oil level is between the upper and lower marks when you pull out the dipstick and wipe it off. Oil is like the blood for your engine. Too little oil can hurt your engine bad.
Next thing is to check the oil pressure gauge on the dash. For me, I want to see the needle somewhere in the middle zone, not too low.
The oil pressure needs to be enough to spread the oil everywhere to lubricate the engine parts. No pressure means no lube. No lube means the crankshaft and bearings get damaged.
My opinion – without enough oil and pressure, your engine will overheat quick. It can seize up solid and cost big bucks in repairs. Personally, I don’t want that headache.
What are the Causes Of Oil Leakage From Car After Service?
Here are the causes of the oil leaking from the car after an oil change:
1. Residual Oil After Changing Oil
The oil change makes some leftover oil on the underside or splash guard of the car. This oil can also stay around the drain plug and filter. If not wiped off fully, it can start dripping down making it look like the car has an oil leak.
How to fix?
To fix leftover oil after an oil change, clean the area near the drain plug and oil filter well. Use a rag and an oil cleaning liquid like brake cleaner or engine degreaser.
Make sure to wipe off extra oil or dirt collected below the car or near the plug.
It’s important to remove all leftover oil fully. Even if you think it’s done well, check again to be sure.
After cleaning the oil well, park the car on cardboard for some time to see if any oil spills.
2. Engine Oil Is Overfilled
Engine oil overfilling is exactly what it sounds like: adding too much engine oil to your vehicle.
It is important to understand why overfilling your oil can be so detrimental to your vehicle.
The motor oil in your vehicle is designed to lubricate the metal parts as they move against one another. If too much oil is added, however, it can be dangerous.
Furthermore, when too much oil is added, the level in the oil pan becomes too high. That allows a fast-moving lobed rod called the crankshaft to come into contact with the oil and foams it up, which increases the pressure in the engine.
This pressure pushes oil out of the engine past the gaskets and seals, creating an oil leak.
How to determine that engine oil is overfilled?
A person overfills the engine oil when he/she does not know the exact quantity of oil required by the engine.
Before adding engine oil, you should always check the engine oil level when the engine is cold. This is because when the engine is heated, the oil expands and becomes thinner.
So, if you do not properly check of engine oil level, you’ll overfill it. When the engine is cold, the oil level should be between the upper and lower marks on the dipstick.
When changing the engine oil, make sure to check the owner’s manual for the recommended amount of engine oil needed, including the oil filter.
Avoid mixing old oil with new oil as it can affect the accuracy of the amount required.
If you do mix, take note of the amount of old oil and add it to the new oil. Keep in mind that the engine oil capacity stated in the manual is only accurate if the oil pan is drained completely, and the old oil filter is replaced without adding in any old oil.
How to know how much oil is in the engine?
To know how much oil is left in the engine before filling it with the oil, you should keep in mind that the engine oil dipstick does not touch the bottom of the oil pan.
When the oil dipstick is bone dry, your engine still might have 1 to 2 quarts of oil left. Usually, the high/low marks on the dipstick are a quart or less apart.
3. Improperly Installed Oil Filter
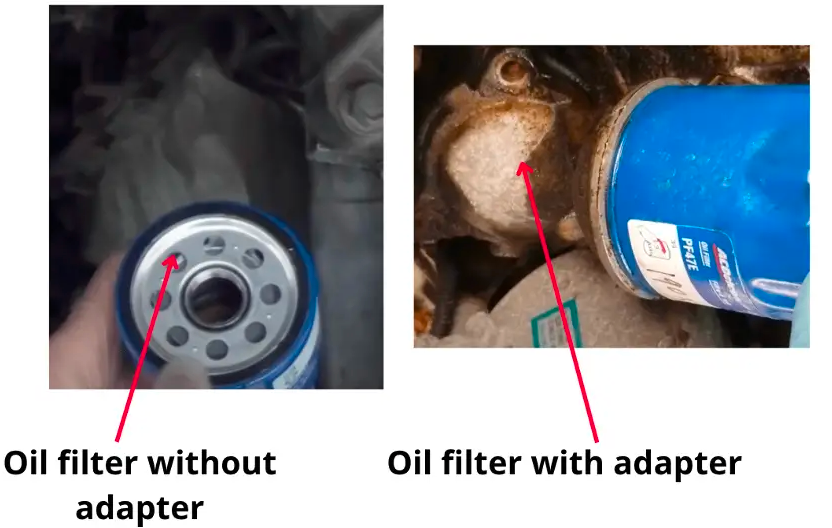
An oil filter is a replaceable cartridge installed in the engine of your vehicle that keeps small particles and debris from getting into the engine and causing damage.
If the oil filter is not properly installed while changing the oil, it can cause the oil to leak out around the filter.
This is because when the oil filter is installed, it’s supposed to create a tight seal with the gasket. If the filter is not on straight, it won’t create a tight seal and the oil will leak out.
In such cases, the size of the oil filter matters a lot. If the aftermarket filter size is incorrect, the oil filter may not properly seat on the mounting surface.
The configuration of the oil filter fitting depends on the type of engine. In some engines, an oil filter is fitted into the engine block through an adapter. In other engines, the oil filter is directly bolted into the engine block.
Furthermore, while replacing the oil filter, most people forget to remove the old gasket that usually sticks to the engine block.
If you accidentally use two gaskets while installing the oil filter, they will blow out due to excessive pressure and cause oil leakage after changing oil.
So, you’ve to make sure that there is only one gasket of the oil filter while installing it. Sometimes, the old gasket sticks into the engine block where the oil filter is mounted. So, you have to check that.
You can check out the below video from 5:00 time. That guy has explained in detail about the leakages through the oil filter.
4. Drain Plug Is Not Properly Tightened Or Crush Washer Is Missing
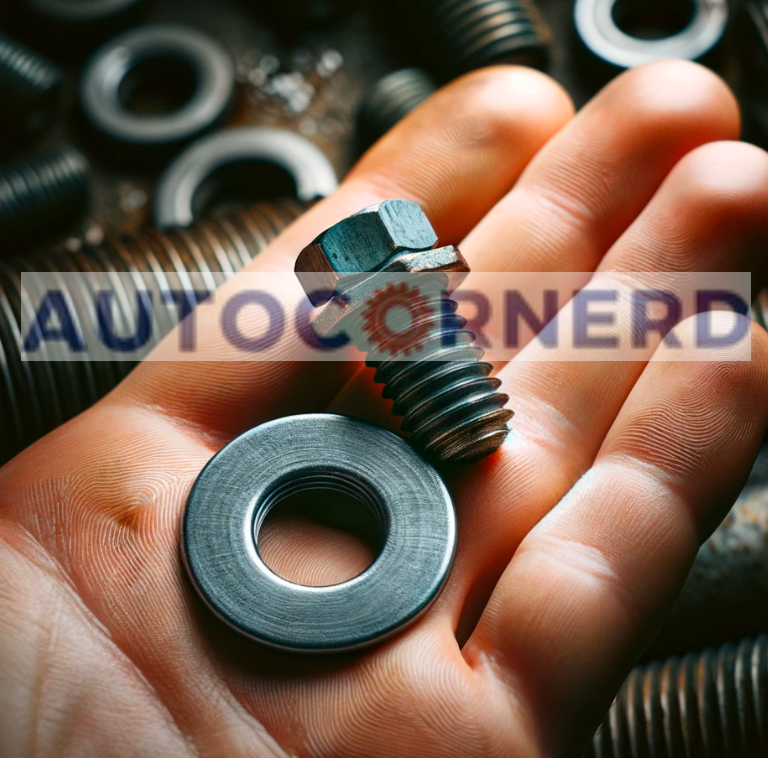
The drain plug runs into the oil pan. To change the oil, we have to remove the drain plug to drain out the old oil from the oil.
After changing the oil, the mechanic usually makes a mistake while tightening the drain plug. If the drain plug is over-tightened, it will squish the copper washer out of shape.
Moreover, if the drain plug is loose, the oil pan gasket will not be properly pressed against the engine block to seal the mating surface of the oil pan.
Lastly, mechanics forget to put the new crush washer of the drain plug of the oil pan while tightening. The old washer/seal of a drain plug can’t seal the gap properly between the drain plug and the oil pan. So, a new washer for the oil pan is necessary.
5. Oil Pan Gasket Is Not Properly Seated
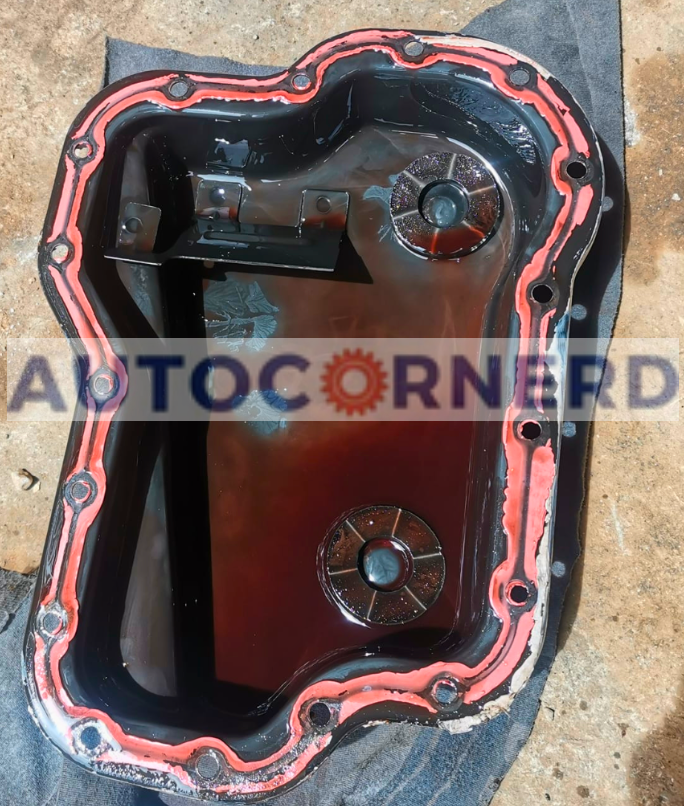
While changing the oil, the oil pan may need to be removed and cleaned before adding new oil. The oil pan gasket is also removed to clean the mating surface of the oil pan (the surface on which the gasket sits).
This is because the sludge of old engine oil and carbon is deposited on the mating surface that must be cleaned. And this is only done by removing the oil pan gasket.
If the gasket of oil pan is damaged, you should use an OEM-recommended oil pan gasket. Don’t go for cheap aftermarket alternatives.
Before installing the oil pan gasket, you need to do the following steps:
- Mating surface of the oil pan is clean
- Mating surface of the oil pan is not warped
- RTV sealant should be applied on the mating surface of the oil pan. After mounting the gasket to the oil pan, allow some time for the adhesive to set. To test for slippage, press on the gasket lightly.
- Oil pan bolts should meet torque specifications
To install a new oil pan gasket, use the engine degreaser to clean the mating surface of the oil pan, and remove foreign particles, such as RTV, dirt, and oil. If the mating surface of the oil pan is not cleaned properly, it will not seal the gasket.
For chrome-plated oil pans, brush out the threads of the drain hole to remove any flakes that could potentially lead to a leakage. Furthermore, you may need to tap around the bolt holes of the oil pan for further preparation. By following these steps, you’ll ensure a safe and effective seal of your oil pan.
When it comes to checking if the mating surface of an oil pan is warped, two tools are necessary: a straight edge and a feeler gauge.
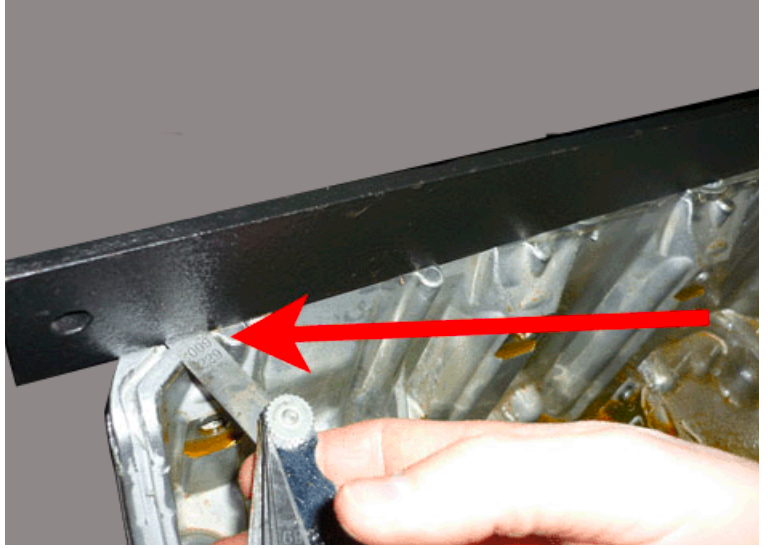
Begin by placing the straight edge along the flange that contacts the engine block. Take the feeler gauge and pass it under the straight edge, looking for any gaps wider than 0.1mm. If you detect any warping, you will need to bend, pound, or hammer the oil pan until it is even.
6. Using Of Incorrect Visocity Grade Of Oil
The thickness of oil tells us how easily it flows. How easily oil flows is really important. It helps the oil spread all over the engine parts and keep them working smooth.
Cars need just the right thickness of oil. As your car gets old and drives more miles, it might need thicker oil.
As engines get old, the seals wear out more, and clearances between engine parts increase. Using thicker oil, like 5W-30 instead of 5W-20, is better. The thicker oil fills the extra spaces so parts wear less.
So if your older engine still uses thin 5W-20 oil, it might start leaking. The oil can get through the worn seals and spaces.
Also, if you used regular oil before, and now use synthetic, it might leak more. Synthetic oil is a little thinner. It also cleans really well. It can wash away gunk that collected around seals over time. That leaves gaps for oil to leak through.
How Long Does It Take To Fix An Oil Leak?
The fix time depends on the oil leak’s size. A small oil leak may take 30 minutes. This could need tightening the oil pan or filter, changing a small gasket, or replacing a seal. Bigger oil leaks take more time. Replacing an oil pan gasket or valve cover gasket takes over 4 hours to fix oil leaks.
To stop oil leaks, focus on:
- Check seals and gaskets: Replace any seals and gaskets with cracks or damage. Good seals stop leaks.
- Use top-quality oil and filters: These protect seals and stop leaks. Follow the manufacturer’s guide on the right stuff.
- Careful when changing oil: Put new oil filter in a right manner. Tighten drain plug well with a new washer,
- No overfilling oil: Too much oil pressure in cracnkcase causes leaks. Check the manual for the right mount of oil.
- Look for leak signs like oil spots below the car, burning smell, and dashboard warnings.
Autocornerd team has made a tool for vehicle maintenance schedule lookup. So, be sure to check that out.
Some First Hand Experiences Shared By Users In Different Communities
Our team conducted research across various online communities, forums, and subreddits to gather user comments and opinions on “oil change results in car leak”.
User 1 says:
Just had an oil change on my Sonata last week, and noticed a small puddle of oil underneath the next morning. Turned out, the oil filter wasn’t tightened properly. A quick trip back to the mechanic, and it was sorted with no further issues.
User 2 says:
Had a similar issue with my F-150. The oil leak turned out to be due to a cracked oil pan. I only noticed it because of a strange smell and a small patch of oil on the driveway. Replacement wasn’t cheap but necessary.
User 3 says:
After an oil change in my Renegade, I started noticing oil spots on the ground. The service center had installed the wrong oil filter, leading to a leak. They replaced it at no extra cost, but it was an inconvenience.
User 4 says:
My Lexus RX started leaking oil after a recent oil change. I was initially puzzled but later realized the oil drain plug was not properly seated. It was a simple fix but a reminder to double-check the work done during maintenance.