
Check Engine Light Comes On After An Oil Change? 8 Causes + How To Fix?
The check engine light may illuminate after an oil change if the oil cap or dipstick were not properly resealed, the oil level is too low, or the wrong oil was used. An improperly installed oil filter can also trigger the light. The light won’t turn off right away, even after fixing the issue, since drive cycles must be completed to reset the computer. Proper oil cap/dipstick seating and using the manufacturer recommended oil and filter will prevent the check engine light from coming on after an oil change.
Changing oil often keeps your engine running smoothly. It is so annoying when the check engine light turns on right after an oil change!
Don’t worry – this usually does not mean there is a big problem. Here is what causes the engine light to come on and how to fix it.
The oil change can mix up gunk in your engine. This gunk can clog sensors that check engine work. The gunk confuses the sensors and turns the check engine light on.
Putting in new oil instead of old oil also changes the oil pressure inside the engine. Different pressure can make sensors think there is an issue. This starts the check engine light.
Read this guide till the end as I will explain each step in detail so that you can fix the problem yourself and get your car back on the road.
If your car won’t start after oil change, you can read my guide on the causes of car not starting after oil change.
- Check engine light after oil change can be caused by loose or damaged sensors, unseated caps, wrong oil level, or incorrect oil viscosity.
- Mechanics may disconnect sensors like the MAF when changing oil, if not properly reconnected it causes issues.
- Loose or damaged oil filler caps and dipsticks allow air leaks, triggering the check engine light.
- Overfilled or insufficient oil levels affect performance, causing the ECU to turn on the warning light.
- Using the wrong oil viscosity grade not specified by the manufacturer can also lead to illumination of the check engine light.
- Trouble codes should be scanned to accurately diagnose the issue before resetting the light after repairs.
My Personal Experience With Check Engine Light Illumination After Oil Service
When my uncle’s 2010 Toyota Camry’s check engine light came on shortly after an oil change, I used an OBD2 scanner to pull the code.
It was for the mass airflow sensor. I popped the hood to inspect it and found the sensor connector was loose.
I unplugged it, cleaned the contacts, then firmly replugged it. After clearing the code, the engine light stayed off.
What To Do When Check Engine Light Comes On?
The check engine light on the dashboard means the car’s diagnostic system found a problem. When it comes on, stop and scan error codes with an OBD2 tool. This identifies why the engine light is on.
The check engine light could mean a sensor or part has an issue. Sensors (MAF/MAP, O2, Throttle Position) check the air, fuel, and emissions. If one doesn’t work right, the check engine light comes on.
Also, if the check engine light is on after an oil change, the oil could be low. Add oil to see if the light turns off.
Why Is Check Engine Light On After An Oil Change?
Check engine light on after an oil change may occur due to the following reasons:
1. MAF or MAP Sensor Is Unplugged
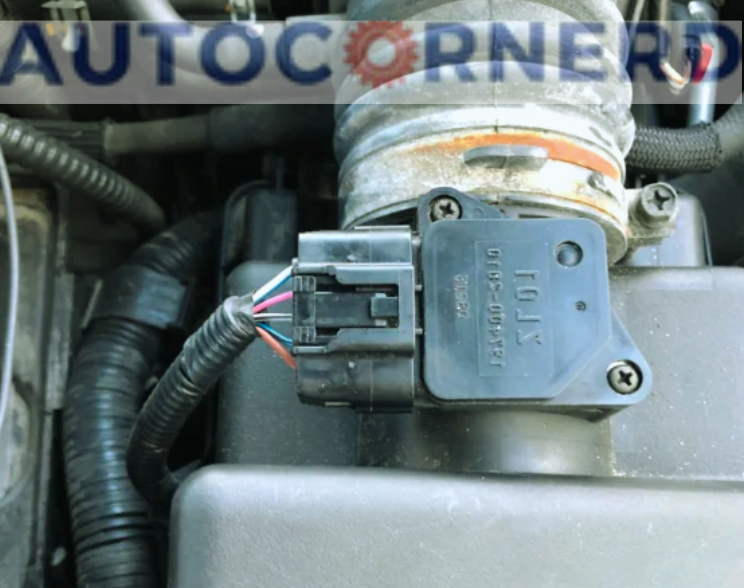
If you have got your engine oil refilled by the mechanic, the chances are that the mechanic has unplugged the MAF sensor to check the engine air filter or to reach the oil filler cap while changing the oil.
The mechanics and car dealers have a habit of checking the health of MAF sensor and engine air filters while changing engine oil to make sure that the engine runs properly.
If the MAF sensor is unplugged or the engine air filter is not properly fitted, the air will leak into the engine and the MAF sensor will not be able to record it. It will disturb the ideal air-fuel ratio for efficient combustion. This will cause the check engine light to turn on.
So, you should pop the hood and make sure all wires/hoses/clamps are in good condition and connectors are correctly plugged.
2. Oil Filter Is Not Properly Seated
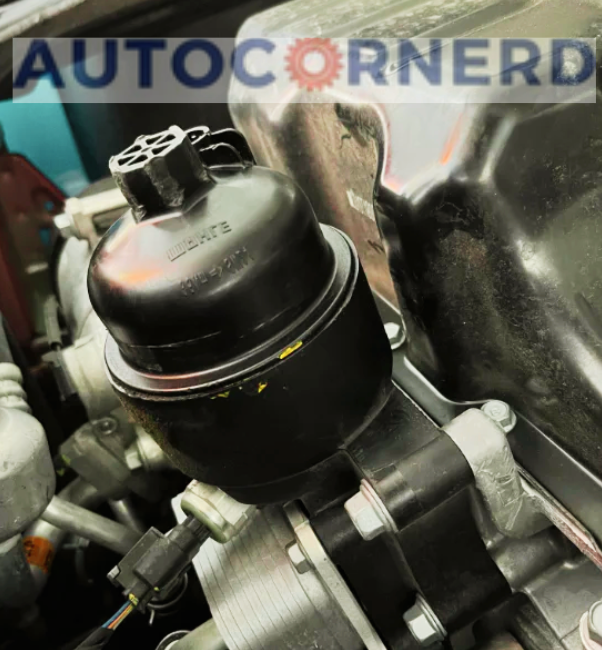
Your check engine light also comes on after changing oil if you have installed the wrong oil filter and is not seated properly.
It is a good practice to also replace the oil filter while changing the oil. The oil filter is there to remove impurities from the oil as it circulates through the engine. If the oil filter is clogged, it can’t do its job properly. This is why the oil filter is also replaced while changing oil.
You can’t just install any oil filter into your engine. Each engine oil filter has a certain rating based on the filter’s material design.
If the wrong oil filter is fitted after an oil change:
- It will cause oil leakage through the engine
- It will either allow too much oil to flow without filtration or restrict the oil flow which can overheat the engine. This will cause the check engine light to turn on.
So, make sure you use the oil filter recommended by the manufacturer. Furthermore, the oil filter should be properly tightened. Also, make sure to remove the old gasket/o-ring from the oil filter.
The O-ring of the old oil filter is stuck to the engine block. So, make sure to remove it. If you accidentally have a double-gasket oil filter, it will blow out and excessive oil will start leaking through it. I have explained the fitting of the oil filter in my guide on 5.3L engine common oil leaks.
3. Loose Oil Dipstick
If the oil dipstick is not properly seated after an oil change, it can cause the check engine light to come on.
The oil level is usually checked through the dipstick after filling the engine with oil.
The chances are that you have not fit the oil dipstick properly after checking the oil level which may cause the air to enter the engine and affect the air-fuel mixture. This air will be termed ‘unmetered air’ as the MAF sensor couldn’t record its flow and send signals to the ECU to adjust the fuel injection accordingly.
As a result, a loose oil dipstick will cause the check engine light to come on after the oil change.
Furthermore, the oil dipstick tube, in which the dipstick is inserted, may develop a crack or separate from the engine while pulling out the dipstick to check the engine oil.
The fitting of a dipstick tube depends on the make and model of the vehicle. So, you have to consult the owner’s manual.
Here are some tips to seat the oil dipstick and dipstick tube:
- Make sure the opening of the dipstick tube, where the dipstick is inserted, should be free from all debris or burrs.
- Clean the dipstick passage of all oil residue with brake cleaner on a rag to about a depth of one and a half inches.
- Evenly coat the insert end of the dipstick with RTV silicone sealant. Allow the silicone to set up for about two to three hours before starting the engine.
- Avoid bending the dipstick while inserting it. You can put a dipstick in the freezer overnight and slip it right in.
4. Low Oil Level Or Pressure
If you do not refill the engine with enough engine oil, the “check engine” light will turn on. The oil pressure or oil level light on the dashboard will also turn on. You can read my guide about low oil pressure to learn more about why it happens.
The stick you use to check your engine’s oil level does not touch the bottom of the oil pan. When the stick looks completely dry, your engine might still have 1 to 2 quarts of oil left. Usually, the full and low marks on the stick are less than a quart apart.
You should always read the owner’s manual when refilling your engine with oil. The engine oil should be between the full and low marks on the oil dipstick.
5. Too Much Oil Is Filled
The engine has a full oil level mark on the dipstick. If you put in too much oil, the extra oil can cause problems. The oil can get bubbles in it which makes it not lubricate or cool the engine as well.
Also, oil can go into the spark plug parts. This makes the engine not run right. It can make the check engine light turn on too.
So only fill the oil to the full mark. Don’t go past it. Check the dipstick to see the oil level. Keeping the right oil amount will help your engine work its best.
6. Oil Filler Cap Is Installed Incorrectly
If you have not put on the oil filler cap correctly after you change the oil, the check engine light will come on.
If the oil filler cap is not seated correctly, the unmetered air will suck into the engine which the MAF sensor will not be able to detect.
As a result, the ECU (Engine Control Unit) will not be able to determine the appropriate amount of fuel to be injected into the engine cylinder. It will cause the engine to run lean (more air and less fuel), which will turn on the check engine light.
My car had the issue of a loose oil filler cap which was the cause of a check engine light. When I pulled the trouble code using the OBD2 scan tool, it displayed the P0171 code. The engine can also run lean and can have a check engine light if you start the engine without putting the oil filler cap in place.
You can ensure correct oil filler cap installation by tightening the cap to a hard stop.
If the filler cap is not tightening properly, you can make it secure by wrapping the threads of the filler cap in duct tape. Also, make sure to install a new O-ring to the oil filler cap and grease it with the oil before tightening it.
7. Using the Wrong Engine Oil
Using the wrong viscosity of oil when changing the oil will also turn on the check engine light. When you use the wrong oil in your engine, it doesn’t lubricate the parts as well as it should.
This can cause increased wear and tear on the engine, which can eventually lead to engine damage.
Moreover, using the wrong oil can also affect the optimum oil pressure in your engine which can trigger the check engine light.
The check engine light is designed to warn you of potential engine problems, so it will come on if it detects an issue with the oil.
Engine oils have different viscosity grades, such as 5w30, 10w30, 5w20, etc. If the manufacturer recommends engine oil of 5w20 viscosity grade, and you use 5w30 instead, it could harm the engine.
You can read my guide on 10w30 vs SAE 30 engine oil to learn more about engine oil viscosity grades.
8. PCV Hose Disconnected
In the engine, a Positive Crankcase Ventilation (PCV) system is there. This system collects extra oil vapors from the crankcase. Then it delivers the vapors through the air intake system of the engine.
The PCV hose connects to the engine’s air intake manifold. Through the hose, oil vapors get sucked. This happens by the vacuum the engine makes.
If by mistake the PCV hose gets disconnected during an oil filter check at an oil change, extra air will enter the engine through the PCV valve. The car’s computer (ECU) will then think the engine is running lean. So it will turn on the check engine light.
What To Do If Check Engine Light Is On After Oil Changing Oil In Jeep?
If the check engine light is on after changing oil of your Jeep, you should pull diagnostic trouble codes that result in the illumination of the check engine light.
Here is how to read trouble codes in a Jeep Wrangler without the OBD2 scan tool:
- Insert your key into the ignition and turn it to the ‘ON’ position but do not start the engine.
- Push the key into the ignition cylinder and while holding it in, turn it to the ‘OFF’ position and then back to the ‘ON’ position (3) times straight making sure to end with it in the ‘ON’ position. It is important to keep pushing in on the key to prevent it from catching at the different positions along the way.
- If you do step #1 correctly, all your dash lights will illuminate and your odometer will show up as a series of (6) dashes. If your Jeep JK Wrangler has any logged in any DTC’s, they will be displayed soon after the dashes appear. Write down the DTC’s and check it/them against the list to find out what they mean.
- If your Jeep JK Wrangler has not logged in any DTC’s, the dashes on your odometer will be followed by the message ‘-done-’.
- Turn your key to the ‘OFF’ position and you will in fact be done.
What To Do If Check Engine Light Is On After Oil Change In Toyota?
Check engine light after oil change of Toyota can be caused when a knock sensor loosens. Usually, mechanics also look at the condition of an engine air filter while changing oil.
During this procedure, the knock sensor gets loose quite easily as it is located right next to the filter, a little bit above it and towards the firewall a little more. So, you have to check the knock sensor and make sure it is properly tightened.
How To Reset Check Engine Light After Oil Change?
To reset the check engine light after oil change:
- Determine the cause of a check engine light and fix it
- Find OBD2 port of your engine.
- Connect OBD2 scan tool to the OBD2 port.
- Erase the trouble codes using the OBD2 reader by pressing the “scroll” button to find the erase option.
You can also reset the check engine light by disconnecting the negative terminal of the battery and reconnecting it.
When the check engine light turns off after clearing the codes, you should drive your vehicle for 20 to 30 drive cycles and see if the check engine light again comes or not. You can read my guide on how long can you drive with check engine light on.
Is It Normal For Check Engine Light To Come On After Oil Change?
The check engine light should not come on after an oil change. If it does happen, it likely means the oil filler cap was put on backwards or left too loose.
When the cap doesn’t seal the oil right, air can leak in the engine. The engine oil itself could also be the issue if the check engine light turns on after an oil change. Using oil that’s the wrong thickness or viscosity can make the check engine light come on.
Final Thoughts About Engine Light Warning After Oil Change
The check engine light turns on after an oil change sometimes. This happens when the oil cap or dipstick is not put back properly.
There are other reasons too for the engine light to turn on:
- Oil level is too low
- Using wrong thickness of oil
- Oil filter is loose
The engine computer sees a problem and turns the light on. An OBD2 scanner sees the exact issue.
Common causes of check engine light after oil change are:
- A sensor got disconnected
- Caps are loose
- Too much oil added
- Wrong oil used
FAQs
What should you do when the check engine light comes on?
Use an OBD2 scanner to pull the diagnostic trouble codes. This will help identify the cause, then you can fix the problem.
How do you reset the check engine light after an oil change?
First diagnose and fix the underlying issue. Then use an OBD2 scanner to clear the codes. Drive for 20-30 cycles to reset the light.
Is it normal for the check engine light to come on after an oil change?
No, it usually indicates a problem was introduced during the oil change, like an unsecured oil cap.
Could an oil change cause any other issues besides the check engine light?
Yes, driving with low oil can cause engine damage over time. The light could also indicate problems like loose gas cap or faulty oil sending unit. Get codes scanned to pinpoint the cause.
How can a mechanic prevent the check engine light from coming on after an oil change?
They should double check procedures like torque specs on drain plug, replacing filter, proper oil level before returning car to customer. Taking care at each step can prevent errors.
Will the check engine light eventually turn off after an oil change sets it off?
The light will stay on until the error is fixed. Resetting oil life monitor or simply refilling oil may not work. The underlying issue needs to be properly diagnosed and repaired.
Some First Hand Experiences Shared By Users In Different Communities
Our team conducted research across various online communities, forums, and subreddits to gather user comments and opinions on “check engine light coming on after refilling oil”.
User 1 says:
Had this weird thing happen with my ’09 CR-V. Right after an oil change, the check engine light popped on. I was puzzled, so I checked the oil cap and dipstick. Turns out, the cap wasn’t tightened properly. Fixed that and the light turned off after a few miles.
User 2 says:
In my 2015 Ranger, the check engine light turned on right after an oil change. I initially thought it was an oil issue, but a mechanic friend suggested checking the O2 sensor. Bingo! It was unplugged. Reconnected it, and the light was gone.
User 3 says:
In my MX-5, the light turned on after the oil change. I checked the oil level and it was overfilled! Drained a bit to the correct level, and after a day of driving, the light went off. Always double-check the oil level!
User 4 says:
Had a similar scare with my 2017 Sonata. It turned out to be a faulty oil pressure sensor. Replaced it myself after watching a tutorial online. It was a bit tricky but saved me a trip to the mechanic.
How did you fix your issue of check engine light after oil change? Please vote.
[yop_poll id=”20″]