
Check Engine Light Still On After Filling Coolant: 8 Causes + How To Fix?
If the check engine light is still on after filling coolant, the chances are that the coolant thermostat is stuck open or coolant temperature sensor is faulty. Furthermore, there is a possibility that the check engine light of your vehicle was on at the same time when the coolant level was low. You thought that it was because of a low coolant level. So, you filled the coolant and expected that the CEL will go off. But, the cause of the check engine light was something else. You should have an OBD2 scan tool to pull the trouble codes so that you can find the root cause of the check engine light still on after filling the coolant.
You’ve been driving your car for some time now. You saw the check engine light was still on after you filled the coolant or did a coolant flush. You don’t know what to do next. You’re starting to worry a little.
Before you start to feel scared, first check if you filled the coolant to the right levels in your car. If the coolant level is low, that could be why the check engine light is still on.
- Check engine light stays on after filling coolant due to improper coolant level, loose radiator cap, loose drain bolt, wrong coolant type, air trapped in system, stuck thermostat, faulty coolant temperature sensor.
- Double check coolant level between min and max markings after topping off. Tighten radiator cap fully. Apply thread sealant on drain bolt. Use proper coolant type as per manual.
- Bleed air from system properly after flush. Test thermostat and temperature sensor. Pull codes to confirm issue not unrelated to cooling system.
- Overfilling coolant won’t directly cause check engine light. The engine light could be due to other faulty sensors or dirty air filter.
Causes Of Check Engine Light Still On After Filling Coolant
Check engine light still on after the coolant flush is due to the following reasons:
1. Inappropriate Coolant Level
If you have not filled the coolant to the appropriate levels, the engine computer will think that the engine is running low on coolant, due to which it will turn on the check engine light to prevent engine damage from overheating.
If you do a coolant flush and add a new coolant, you need to add coolant in the overflow tank as well as in the radiator.
If you have not properly filled in the coolant, the coolant pressure sensor will detect abnormalities, due to which the engine computer will cause the check engine light to turn on.
Moreover, while filling the coolant, make sure that the engine is cool. The coolant level must be between MIN and MAX marks or FULL/LOW marks on the overflow tank.
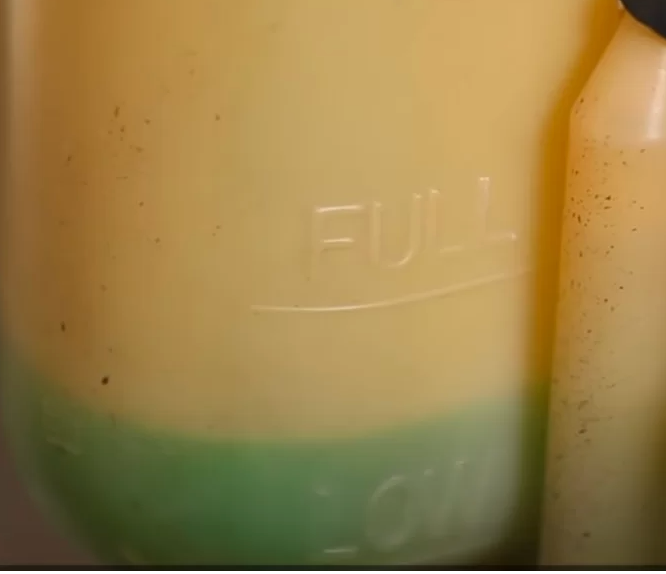
It is not advisable to fill the coolant up to the MAX level of the overflow tank as the coolant expands when the engine is heated while it is running.
Lastly, after you have filled the coolant to a certain level, make sure the coolant is not leaking from anywhere in the engine. Without the engine running, you should check the water pump.
Some vehicles are known to have water pump problems/leaks. A cold engine will only show signs of a water pump leak as a slight dripping on the pulley attached to the water pump. When the engine is running, the high pressures cause the water pump to reseal.
Another way to check a coolant leak is to open the oil filler cap and see if you are observing a milky texture or smelling a maple syrup-like smell. A coolant leak also causes white smoke from the exhaust.
Furthermore, you should check the coolant level in the coolant reservoir the next few times you drive your vehicle after topping off the coolant.
2. Loose Radiator Cap
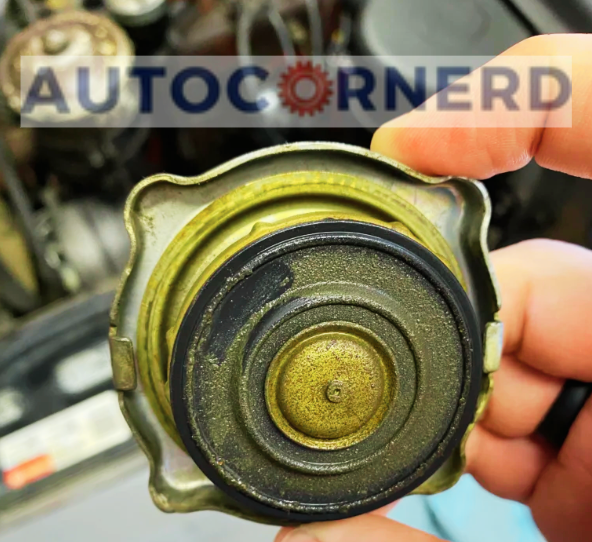
The radiator cap needs to be tight. If it is loose, air can leak into the radiator. Air in the coolant can damage the engine. A loose radiator cap also stops the right pressure from building up inside the radiator.
Pressure affects the boiling point. More pressure means a higher boiling point. Less pressure means a lower boiling point.
With a loose radiator cap, there is not enough pressure in the radiator. So the coolant boils at too low a temperature. It cannot flow smoothly to all engine parts.
The engine computer sees something is wrong. It turns on the check engine light after adding coolant. A tight radiator cap stops air leaks. It allows the right pressure. This helps the coolant work properly. Then the engine runs smoothly.
How to fix?
You should turn the radiator cap clockwise and tighten it fully to the hard stop. Depending on the engine, there will be two clicks when you fully tighten the radiator cap. If the radiator cap has become bad, it is better to replace it.
It is quite a cheaper fix. Make sure to only buy an OEM radiator cap that can hold the designed pressure inside the cooling system of your engine. Otherwise, the high pressure will damage the radiator cap.
3. Loose Radiator Drain Bolt

During the coolant flush, we have to untighten the radiator bolt to remove the old coolant. After the coolant flush, the radiator bolt is not properly air-tightened.
So, it seems a good practice to always apply a thread sealant or Teflon tape to the threads of the radiator drain bolt after you refill the coolant.
The threads on the radiator drain bolt can leak if not sealed well. Think of the threads as a path that the liquid coolant can take to drip out. The sealant or tape blocks this path so the coolant stays inside.
You should also tighten the drain bolt to the right torque. The owner’s manual of your engine shows the best torque to use. This helps stop leaks and damage to the bolt.
4. Wrong Coolant Type
The wrong coolant type may also turn on the check light after filling the coolant. Every manufacturer specifies the coolant type based on the material of the engine components.
The cooling system contains different metallic components that can corrode if an improper antifreeze or coolant is used.
First, it is recommended to use a 50% concentration of coolant, and use deionized water to mix with the coolant.
Moreover, do not mix two different coolants as their cooling property and flow characteristics can be affected.
You should also keep in mind that the color of coolant or antifreeze is not important. Engine coolant does come in different colors like yellow, blue or green.
If MINI OEM coolant has a blue color, that doesn’t mean you could use any blue-colored coolant. the specs of the engine coolant should match the specs specified by the manufacturer.
Asking from MINI representative, the statement regarding the coolant was:
“Any coolant(no specific brands), with phosphate, silicate, nitrite, and amino-free extended-duty antifreeze with corrosion inhibitor can be used in your MINI.”
5. Air Trapped In Coolant
While doing a coolant flush, air may get trapped in the coolant. Air in the cooling system can cause a host of problems, chief among them being overheating. This is because air is a poor conductor of heat.
When air is trapped in the system, it prevents coolant from circulating properly. This in turn prevents heat from being properly dissipated, leading to an increase in engine temperature. So, overheating of the engine will turn on the check engine light.
How to fix?
Bleeding the engine cooling system with air is important to remove air. The bleeding procedure of the engine cooling system is usually explained in the owner’s manual.
For instance, in Honda engines, there is a bleeder bolt in the thermostat housing.
Honda advises loosening the air bleed bolt in the thermostat housing, then filling the radiator to the filler neck with the coolant.
When coolant comes out in a steady stream with no bubbles, tighten the bleeding bolt again.
After that, with the radiator cap off, run the engine until it warms up so that trapped air can be removed and coolant properly circulates in the engine.
After that, turn off the engine and check the level of coolant in the radiator. Add a coolant if needed. Install the radiator cap and tighten it fully.
6. Thermostat Is Stuck
The engine thermostat is a temperature-controlled valve located between the engine and radiator. You can find thermostat near the water pump. It is on the cylinder head where the radiator hose connects.
When the engine is cold, the thermostat is closed. This blocks the coolant flow. As the engine warms up, the thermostat valve opens. Now coolant can flow to the radiator. This keeps the engine at the right temperature.
If the thermostat valve is stuck closed, the engine will overheat. The check engine light will turn on.
To learn more about the engine T-stat, read my guide on code P0128.
When doing a coolant flush, check the thermostat too. A stuck thermostat often causes the check engine light.
7. Malfunctioning Engine Coolant Temperature Sensor
The engine’s coolant keeps it from overheating. Flowing through the engine block, it absorbs extra heat. The enginecoolant temperature sensor tracks just how hot the coolant gets. It’s the monitor for the engine’s inner temperature.
You’ll find the ECT sensor living near the thermostat housing. It has a simple duty – report the coolant’s temperature to the car’s computer. With key data on engine heat, the computer can make adjustments to keep things cool.
But a sensor that can’t read right spells trouble. It leads to warning lights lit up bright on the dash. The check engine light comes on thanks to bad sensor values.
Gunked up coolant can confuse even the sturdiest sensor. Dirt and debris coat the sensor, keeping it from taking an accurate reading.
Each engine has its own sensorhome. For some models, you’ll find two ECT sensors. The sensor that matters most sits close against the engine block. Dig in your owner’s manual to find your particular sensor’s spot.
How to test?
The best way to diagnose the coolant temperature sensor is to immerse it in the water, measure the resistance of the sensor at different temperatures and compare the readings to the specifications listed in the service manual.
You can follow these steps to test the engine coolant temperature sensor:
- Immerse the tip of the sensor in the water.
- Connect a digital ohmmeter to the two terminals of the sensor.
- Using a calibrated thermometer, compare the resistance of the sensor to the temperature of the water. Refer to the engine coolant sensor temperature vs. resistance
illustration. - Repeat the resistance at other temperatures by heating or cooling the water.
- If the sensor does not meet the specification shown in the temperature versus resistance chart, it must be replaced.
8. Codes Unrelated To The Engine Cooling System
Sometimes, the cause of a check engine light is unrelated to the engine coolant system.
There are chances that sensors like MAF, Oxygen sensor, Camshaft position sensor or Crankshaft position sensor are malfunctioning and turning on the check engine light. So, you have to use the OBD2 scanner to pull the trouble codes and fix the check engine light issue.
Can Too Much Coolant Cause Check Engine Light?
Too much coolant cannot cause the check engine light. The extra coolant will percolate out the drip tube when it will expand after engine heating. So, if you have a check engine light after overfilling the coolant, it could be due to malfunctioning engine sensors or even the dirty engine air filter.
Some First Hand Experiences Shared By Users In Different Communities
Our team conducted research across various online communities, forums, and subreddits to gather user comments and opinions on “check engine light on after filling coolant”.
User 1 says:
Interesting experience with my ’08 Audi A4. Check engine light popped on post-coolant fill. I initially thought it was a serious engine issue. My mechanic buddy helped me out and discovered it was actually a minor leak in the radiator hose, causing pressure loss. Fixed the hose, reset the light, and it’s been fine since.
User 2 says:
So, my ’13 Civic had this exact issue. Check engine light turned on after I added coolant. Took me a while, but I found out the radiator cap wasn’t seated properly, causing pressure issues. Reseated the cap, and the light cleared after a few drives.
User 3 says:
Ran into this with my ’09 Camry. The check engine light was on after I filled the coolant. I checked everything from hoses to sensors. It ended up being a simple issue – the coolant I used wasn’t compatible with my car. Switched to the recommended type, and the light went off.
User 4 says:
My experience was with a 2010 Altima. The check engine light lit up after I refilled the coolant. Initially, I was clueless. After a bit of troubleshooting, I found out the issue was with the air trapped in the cooling system. Bleeding the system fixed it.